|
Normal
glue. Apply a layer on the blade and on the rubber and join directly and
press it,
no need to wait before joining! Let it dry 6 hours. When you remove the rubber from the blade,
the residue could become glue again with a small quantity of water. To
clean, apply a small quantity of water and scrub with a wet sponge.
Large
brush for easy gluing.
This
glue is transparent and 100% water based. It is particularly gentle to the
sponge, which you'll notice when you pull it off, ie very little (if any) glue
stuck to the sponge, and the sponge still looks like new.
Instructions
/ Review (by Alex)
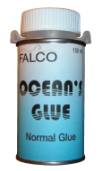
This is a true water-based glue for attaching any rubber to your
blade. The liquid comes in a 150ml tin, with a nice and thick brush for
spreading. The liquid is completely transparent, and dries clear. Only a very
thin layer of the glue is required, and it does not harden completely, and will
not affect the feel of the bat.
NOTE: This is not a contact glue, but a normal glue. Since the
glue is still wet when you apply the rubber to the blade, it has very little
adhesion strength at first, but makes a strong bond after 6 hours of clamping /
pressing. For this reason it may not be suitable for
those that speed glue since it can be tricky getting it into a press
/ clamp when the rubber still has a dome. If there is very doming it should work
fine.
1. Cutting the rubber
I would highly recommend cutting the rubber before you put it
onto the blade. The reasons are:
-
Since this glue does NOT expand the rubber at all, it should
fit perfectly again after you've applied the glue.
-
Since the glue is still wet when you put the rubber onto the
blade, it's easy to move it around to line it up
-
Cutting the rubber when the glue is still wet is very tricky
since it moves around too easily. Cutting the rubber after the glue has
dried is fine, but remember you'll have to make sure the uncut sheet fits in
your clamp or press. If you glue a sheet on both sides, it can also be
harder to cut one side while the other is still uncut.
To cut the rubber simple place the blade into the back of the rubber and draw
the outline of the blade onto the sponge, than cut it with small and sharp
scissors, with only very small cuts at the time.
Tip: Having the scissors a little wet makes it
easier to cut cleanly
Alternatively you can use a real sharp knife, like a box cutter
or scalpel. Put the rubber onto the blade, and lay it down onto a piece of
carton on thick paper. Putting some plastic onto the rubber surface will help
protect it, so I would recommend this. Push down onto the blade a little, and
cut the rubber along the edge of the blade, taking several passes at the time
(trying to cut through the rubber in one pass often leaves jagged edges).
2. Applying the glue to rubber
Put the rubber onto a flat surface (sponge up) and apply a thin
layer of glue to it. I recommend only a very thin layer, since after you attach
the rubber and blade together layer and clamp in step 5, you'll squeeze out any
excess glue anyway, which is both a waste and makes a mess... Since the
liquid is a little thick, small strokes makes it much
easier to spread it thin and evenly.
3. Applying the glue to blade
Similarly put a very thin layer onto the blade also
4. Applying the rubber and blade together.
Put the rubber onto the blade, and move it around till it lines
up perfectly. and blade are ready to be applied together. This is a simple
matter of lining up the label on the rubber to the blade just above the handle,
and putting down the rest of the rubber onto the blade.
Use a roller or round bottle to roll onto the surface to squeeze
out any air bubbles underneath, taking care that the rubber does not move around
too much. If it move, simple adjust it again. Clean off any access glue that has
come from around the edges. if you spill any onto the rubber surface, it can
easily be cleaned off with a web cloth.
Repeat for the other side.
5. Clamping
A proper bat clamp, or another type of press, or even a stack of
books can be used for clamping. Do not clamp too tight, only just enough to make
sure the rubber is in contact with the blade around the edges. If you clamp
harder, you'll squeeze out some of the glue, making the adhesion less, and can
push out some drop of glue, which when they dry will make it harder to cut the
rubber.
As soon as you've tightened the clamp, check for glue being
squeezed out around the edges. If there a fair bit of glue, it would be good to
clean this off (with a wet cloth) first, before it hardens....
6. Drying times:
Leave the rubber into the clamp for at least 6 hours. After this
the glue should be dry and the rubber firmly attached, ready to ply.
7. Removing the rubber (if required)
If you need to remove the rubber at a later stage, either for
speed glueing or just for replacing or trying a different rubber, it is quite
simple with this glue. You can simply pull it off, starting at a corner where it
may be a little loose already. if you do it slowly and carefully, it should come
off without any damage to either the rubber or blade. Pull at 45 degree to the
direction of the fibre of wood, which reduces the chance of pulling off fibres
off the blade. I have not found this to be an issue with this glue though.
Both the rubber and the blade can easily be cleaned with a wet
cloth, as the glue simply softens up and wipes off. This is a huge advantage
with this glue, as getting it off with other types of glue can be a huge
pain.
If you're going to put on another rubber, no need to remove the
glue from the blade... simple make it wet again by gently wiping it with a wet
clot (don't wipe too hard or too often or you'll remove the glue) and it will
soften again, ready to be used for another rubber! This is a real bonus with
this type of glue!
8. Conclusions:
This glue is a little trickier to use than the normal table
tennis glues, but also has some significant advantages;
1. It is MUCH safer to use than normal table tennis glue.
2. When the ITTF VOC-based glue ban comes into effect, normal
table tennis glues can no longer be used.
3. It is actually water based, and can easily be removed with
water. This glue is particularly gentle to the sponge. Although there are some other VOC free products coming onto the market,
not all are actually water based, and may need solvents to be cleaned
off the surface of the blade or rubber.
4. Glue can be re-activated simply with water.
5. The bond is strong enough to hold the rubber on really well,
but not too hard to remove, and I see the risk of pulling off fibres from the
blade as much lower compared to normal table tennis glues.
NOTE: One of a Kind Trading is the sole
distributor for Australia & New Zealand for the Berenger Falco products. If
you are interested in being a distributor of these products for your area,
please contact us. We can be contacted via Email: lunavander@internode.on.net
or our table tennis forum
or our table tennis ONLINE store
|