Part1: Super Priming
Step 1 - Preparing the rubber
Firstly remove the rubber from the packet and lay it down
onto the table. If you have a Chinese rubber please remove the plastic
protective film on the topsheet and place a piece of cardboard under it to keep
the tacky topsheet from adhering to dust or glue stains. Make sure the cardboard
is blank so that the tacky surface of the rubber cannot pull off any bits/ink
off, or they’ll end on your rubber. If you have European or Japanese style
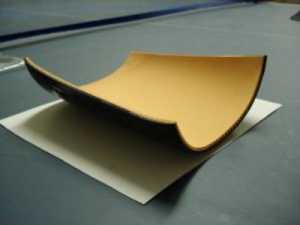
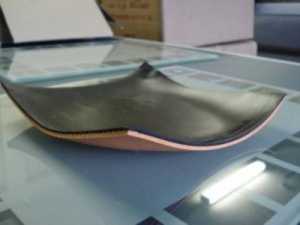
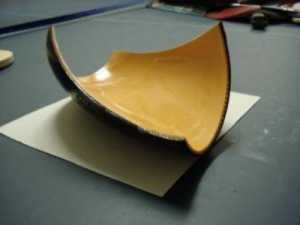
rubbers (non-tacky), then this won’t be a problem. Note that sometimes rubbers
already curl up a little (as pictured) or sometimes they are flat… it does not
matter.
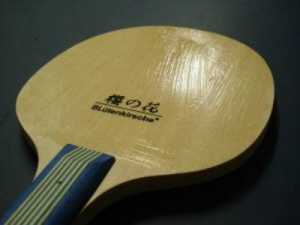
Step 2 - Preparing the blade
If the blade is brand new, it’s best to seal it with some
sort of polyurethane (or varnish or shellac) coating. Only a very thin layer
should be used, enough to protect the top fibres on the surface, but not too
much to affect the feel of the blade. The easiest and most convenient method is
to just use hairspray. Almost all hairsprays contain polymer acrylates which is
basically what holds your hair in place. When sprayed onto the blade it creates
a really thin layer on the surface, which in effect protects it from splintering
but won’t affect the feel of the blade.
The only wood that probably doesn't need sealing is Hinoki. If you
have a hinoki blade then you can skip the sealing.
If you have a old blade that’s been glued many times,
chances are that its got glue stains on it. Although this isn't a major problem
its best to clean it all off.
Step 3 - Applying Glue
3a. Apply a layer of normal glue onto the rubber covering
the entire area. Once you applied the first layer, the rubber may have a bit of
a dome (curls up) by now, which is fine. Leave it for about 10minutes or until
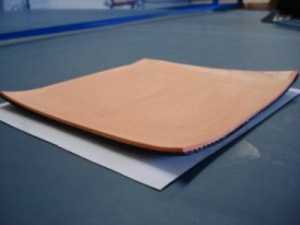
it’s touch dry. Apply another layer and wait again. As you can see from the
picture, the rubber has flattened out, whereas it was curled before. If it had
been flat to start with, it would have curled up.
3b. Now place 4-5 layers of speedglue (wait for each layer
to be touch dry before putting on the next) on the rubber. Pictured after 2
layers and after 5 layers:

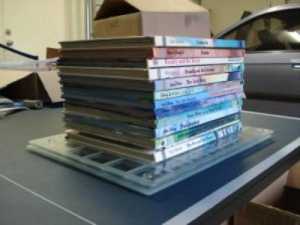
On the 5th layer while the glue is still wet, roll it onto
a glass plate and stack about 5kg's of books on it overnight.
Pictured rubber put onto the glass, and rubber under books:
Important Note: Using this many layers
of glue can put quite a bit of strain on
rubbers, so if you’re not confident that the topsheet and sponge are glued
together well, use less layers, or at least enough layers to get a decent dome.
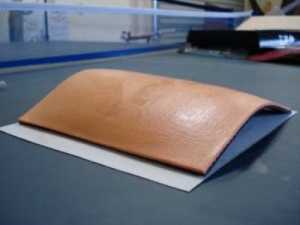
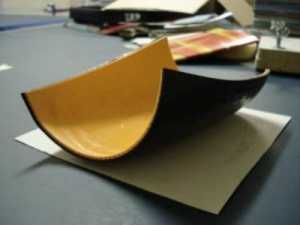
3c. In the morning when you peel the rubber off the glass
plate. There should be a reverse dome instead of the kebab the night before. The
rubber is already much bigger at this stage.
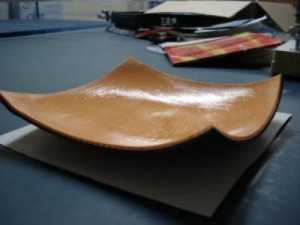
This next stage is crucial as the rubbers size will not
stay that way permanently. Repeat step 3b with the 4-5 layers of speed glue
again and leave it for 3hours onto the glass plate (for best result Overnight is
the best). Pictured after another 5 layers, and after putting onto the glass
plate for a second time.
Next apply a thick layers of glue to the blade and spread
it uniformly across the surface. Once this is done leave it to dry.
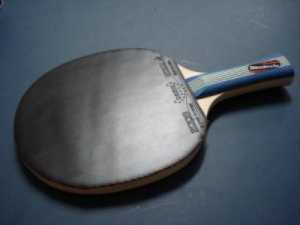
Step 4 – putting the rubber onto your bat
Once the blade and rubber has dried completely, align the
rubber from the bottom and roll (with a bottle or roller) it upwards onto the
blade very gently. If you roll it hard it will stretch the rubber and alter its
characteristics. Once it’s glued onto the racket. Roll it a few more times
just to make sure there are no air bubbles. Use a sharp blade to cut the rubber
and finally place it in a clamp for about an hour.
Note: Cut SPARINGLY meaning leave excess/overhang just to
make sure as some rubbers tend to shrink a few mm's back when they've calmed
down over a few days. This won’t happen if you've been patient. I find that if
you rush and hurry up the whole process. Then it normally shrinks back but in
return, the rubber is faster, softer and springier, but it’s not at the
pinnacle as when you follow the instructions exactly.
Part 2 – Super Priming using Normal Gluing
Below is a series of steps that should be followed to give
you a long lasting solid gluing. This is only for the players that don't like,
or choose not to use speed glue and prefer to keep their racket unglued and
ready to play at any time.
Step 1 - Preparing the rubber
Firstly remove the rubber from the packet and lay it down
onto the table. If you have a Chinese rubber please remove the plastic
protective film on the topsheet and place a piece of cardboard under it to keep
the tacky topsheet from adhering to dust or glue stains. Make sure the cardboard
is blank so that the tacky surface of the rubber cannot pull off any bits/ink
off, or they’ll end on your rubber. If you have European or Japanese style
rubbers (non-tacky), then this won’t be a problem.
Step 2 - Preparing the blade
If the blade is brand new, it’s best to seal it with some
sort of polyurethane (or varnish or shellac) coating. Only a very thin layer
should be used, enough to protect the top fibres on the surface, but not too
much to affect the feel of the blade. The easiest and most convenient method is
to just use hairspray. Most almost all hairsprays contain polymer acrylates
which is basically what holds your hair in place. When sprayed onto the blade it
creates a really thin layer on the surface, which in effect protects it from
splintering but won’t affect the feel of the blade.
The only wood that doesn't need sealing is Hinoki. If you
have a hinoki blade then you can skip the sealing.
If you have a old blade that’s been glued many times,
chances are that its got glue stains on it. Although this isn't a major problem
its best to clean it all off.
Step 3 - Applying Glue
Apply a layer of normal glue onto the rubber covering the
entire area. Its best to apply layers that aren't too thin or thick but just
right. Once you applied the first layer, the rubber may have a dome (curls up)
by now, which is fine. Leave it for about 30minutes so the dome goes down. Note:
sometimes this is longer for different rubbers. Repeat this gluing procedure at
least 3 times. Then leave it for 2 hours so most of the glue effect and dome
evaporates.
Next apply a thick layers of glue to the blade and spread
it uniformly across the surface. Once this is done leave it to dry.
Step 4 - Putting it all together
Once the blade and rubber has dried completely, align the
rubber from the bottom and roll (with a bottle or roller) it upwards onto the
blade very gently. If you roll it hard it will stretch the rubber and alter its
characteristics. Once it’s glued onto the racket. Roll it a few more times
just to make sure there are no air bubbles. Use a sharp blade to cut the rubber
and finally place it in a clamp for about an hour.
Part 3 - Speed Gluing
Below is a few steps that should be followed if you wish
speed glue effectively and have a considerable effect on your rubbers.
Types of glues
To me there has always been 3 types of glues. At the time
of writing this, the VOC glue ban has just been brought into effect, and not
many manufacturers have released VOC free glues yet.
1. Normal glue - Minimal speed glue effect, gives very good
adhesion for sticking new rubbers on. Also great for long pips to give a solid
gluing.
2. Speed glue - At the moment there are tonnes of varieties
of speed glue on the market. Each has a slight difference in composition which
makes it perform in a different way. It’s impossible to name them all and list
their characteristics. So basically, if it isn't normal glue or long life glue,
then its speed glue.
3. Long life Speed glue - These glues, commonly (and
incorrectly) referred to as ‘water based glues’, have entered the market for
a few years now with varying success. They provide the user with close to 4 days
of the glue effect without the hassle of gluing every 3 hours. These glues can
take up to 12 hours to dry before they can be attached onto the blade. They
smell a little really peculiar, some with a distinct fruity type smell.
At the moment I know of Butterfly Millennium chack, Donic
Enduro, Yasaka Pro-Life and Tibhar Rapid Clean Deluxe. These glues all belong to
this category and provide a long life speed glue effect. As far as I know they
are also all made in the same factory in Belgium, and the difference between
them is not huge.
Gluing techniques.
Everyone glues differently so there are many methods of
gluing around. I'll just list the 2 that I think are the most effective. These
apply to the normal speed glue only:
Technique 1.
Apply the glue evenly on to the rubber. Wait until a layer
is touch dry before adding the next layer. The more glue and layers, the more
effect. Once it’s dried, put a thin layer on your blade, wait for it to be
touch dry, and just attach to your blade and clamp it for a few minutes as
usual.
Technique 2.
Apply the glue onto the rubber, and while its still wet
place and clamp the rubber sponge side down onto a glass plate. By doing this
the fumes of the glue are trapped and can only permeate through the sponge. This
method allows maximum glue effect with minimal glue usage. The only downside is
that it takes longer then the above method. Leave the rubber on the glass plate
for about 10-15 minutes, when you peel it off there should be a considerable
dome. If your not happy with the results, then do it again until you get the
desired effect. Once your happy, glue it onto the blade and clamp it.
Part 4: Removing Glue
This section is intended for those that speed glue quite
often and have to deal with glue build up. After about 10 or so gluings the
additional layers don't penetrate the sponge as well thus not giving you the
optimum glue effect. The ideal solution to this is to buy a new rubber (if your
sponsored, shouldn’t be a problem). More commonly though it’s quite easy to
remove the glue build up so you have a fresh sponge to work with again.
1. Using speed glue to remove glue.
If you have a rubber which has a fairly medium to hard
sponge, then this method is ok. Basically apply a layer of speedglue onto the
build up and spread it around very thoroughly. Doing this sort of dissolves the
glue already present on the sponge. About 2 minutes after the application you
can start to rub the glue off the sponge with your fingers. Do it gently and
take your time. If the glue starts to harden up again, use a additional layer of
glue. If your careful, there should be no damage and the rubber will be
immaculate. More commonly if you rush, you can expect to take bits of sponge off
and end up with a mess.
I do not recommend this method with soft rubbers as it will
most likely destroy them.
TIP: If you use long lasting speed glue to do this,
everything becomes easier as that type of glue stays semi solid for much longer
making the whole process easier. Only downside is that it's a waste of precious
glue.
2. Orange Oil
This method basically involves the use of Orange Oil which
is basically a air freshener that can be found in your local supermarkets. The
key ingredient that makes it work is citric acid. If you find any other air
fresheners that contain this, it should work. The Orange Power that Ive been
using for that last 3 years comes in a orange bottle with a purple spray twist
top on it and it sells under the name "Orange Power".
The method is basically the same, spray on 2 layers of the
stuff onto the sponge and wait around 5 minutes for it to be touch dry. The glue
build up should be dissolved and semi-solid. You can easily rub the excess build
up off compared to method 1. If you take too long and the build up hardens. Then
spray another layer.
This method works on any rubbers and works very well with
super soft rubbers that are prone to damage. The only downside is that it may
tint your sponge a slight orange and it may smell like oranges which isn't such
a bad thing.
3. Miscellaneous Methods
Eucalyptus oil, WD40(Grease remover), Ironing, dry rubbing
with thumb. These are all methods I have heard of but they dont work as good.
Eucalyptus oil - This stuff absolutely reeks and leaves a
terrible smell to everything. No doubt it works but the smell alone is enough to
set anyone off.
WD40 - A sworn method of a select few, but I have yet to
try it myself
Ironing - Basically placing a A4 sheet of paper on the
sponge, and then proceed to iron it until the glue melts and is collected on the
A4 paper. I've tried it once and it doesn't work for me. All I was left with was
a pile of molten rubber and paper stuck to the sponge.
Dry rubbing with thumb - some hardcore players out there
reckon they can remove glue just by peeling it or rubbing it away without the
aid of solvents. This is possible with extremely hard sponges that are damage
resistant. Chinese blue sponges also allow this method to work quite easily. Be
aware that trying this method on any other sponge is most likely to cost you a
new rubber.
Copyright © 2007 LawOCG and haggisv
|